ONLEVEL SKYFORCE Juliet Balcony Installation Guide
This guide explains how to prepare for and install an ONLEVEL SKYFORCE Juliet balcony, including model selection, fixing checks, glass sizing considerations and final safety checks. It is designed to support homeowners, installers and trade customers planning a made-to-measure glass Juliet balcony project.
What is the ONLEVEL SKYFORCE system?
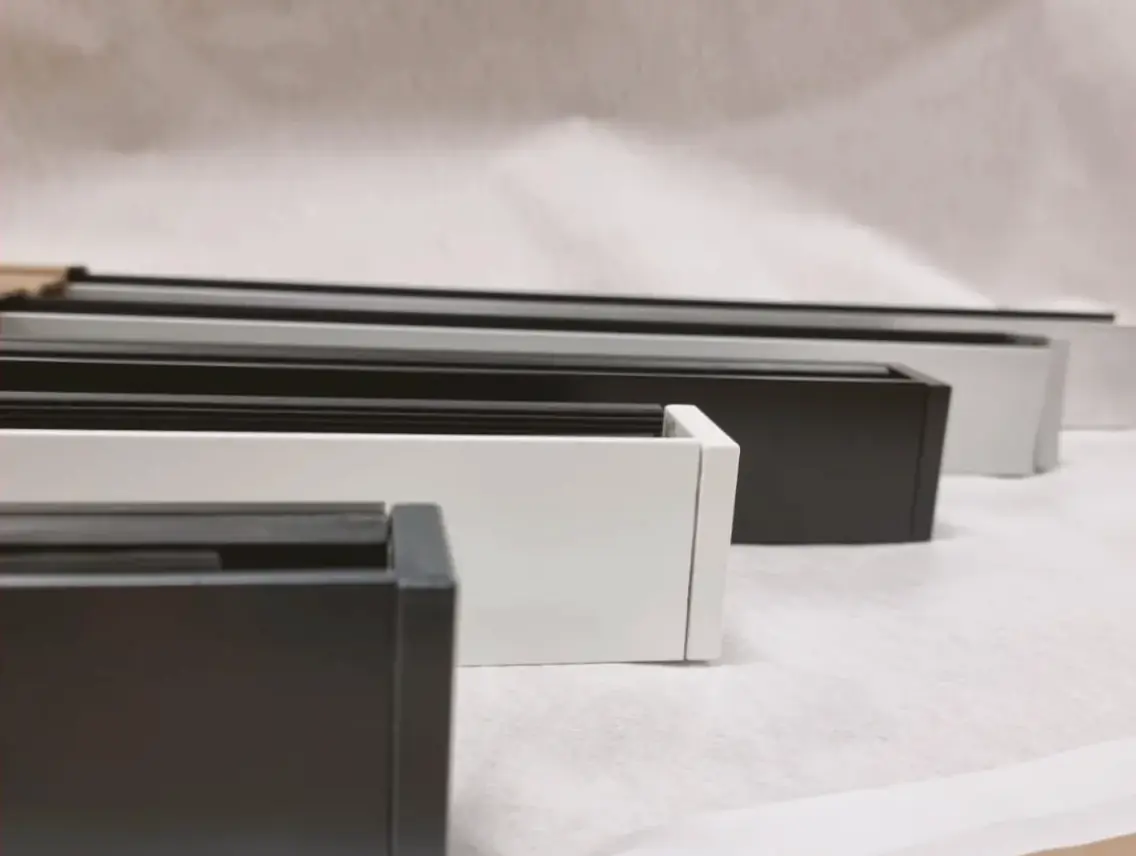
SKYFORCE is ONLEVEL’s Juliet balcony range. ONLEVEL presents it as an almost invisible system for French doors, with variants including SKYFORCE TOP, SKYFORCE SIDE, SKYFORCE SLIM and SKYFORCE FORTRESS. ONLEVEL says the system is designed for quick installation, high compatibility and can be installed from either the inside or outside depending on model type.
- SKYFORCE TOP – top-mounted version
- SKYFORCE SIDE – lateral / reveal-mounted version
- SKYFORCE SLIM – narrow-frame focused version
- SKYFORCE FORTRESS – aluminium Juliet balcony option
Step 1: Confirm the correct SKYFORCE model
Before installation, confirm whether your project uses a top-fix or side-fix SKYFORCE model. ONLEVEL describes SKYFORCE TOP and SKYFORCE SLIM as top-mounted systems, while SKYFORCE SIDE is for side / reveal installation.
- Check whether the balcony fixes to the face, reveal or frame.
- Confirm whether you are using a top-fix or side-fix variant.
- Match the fixing method to the structure and opening type.
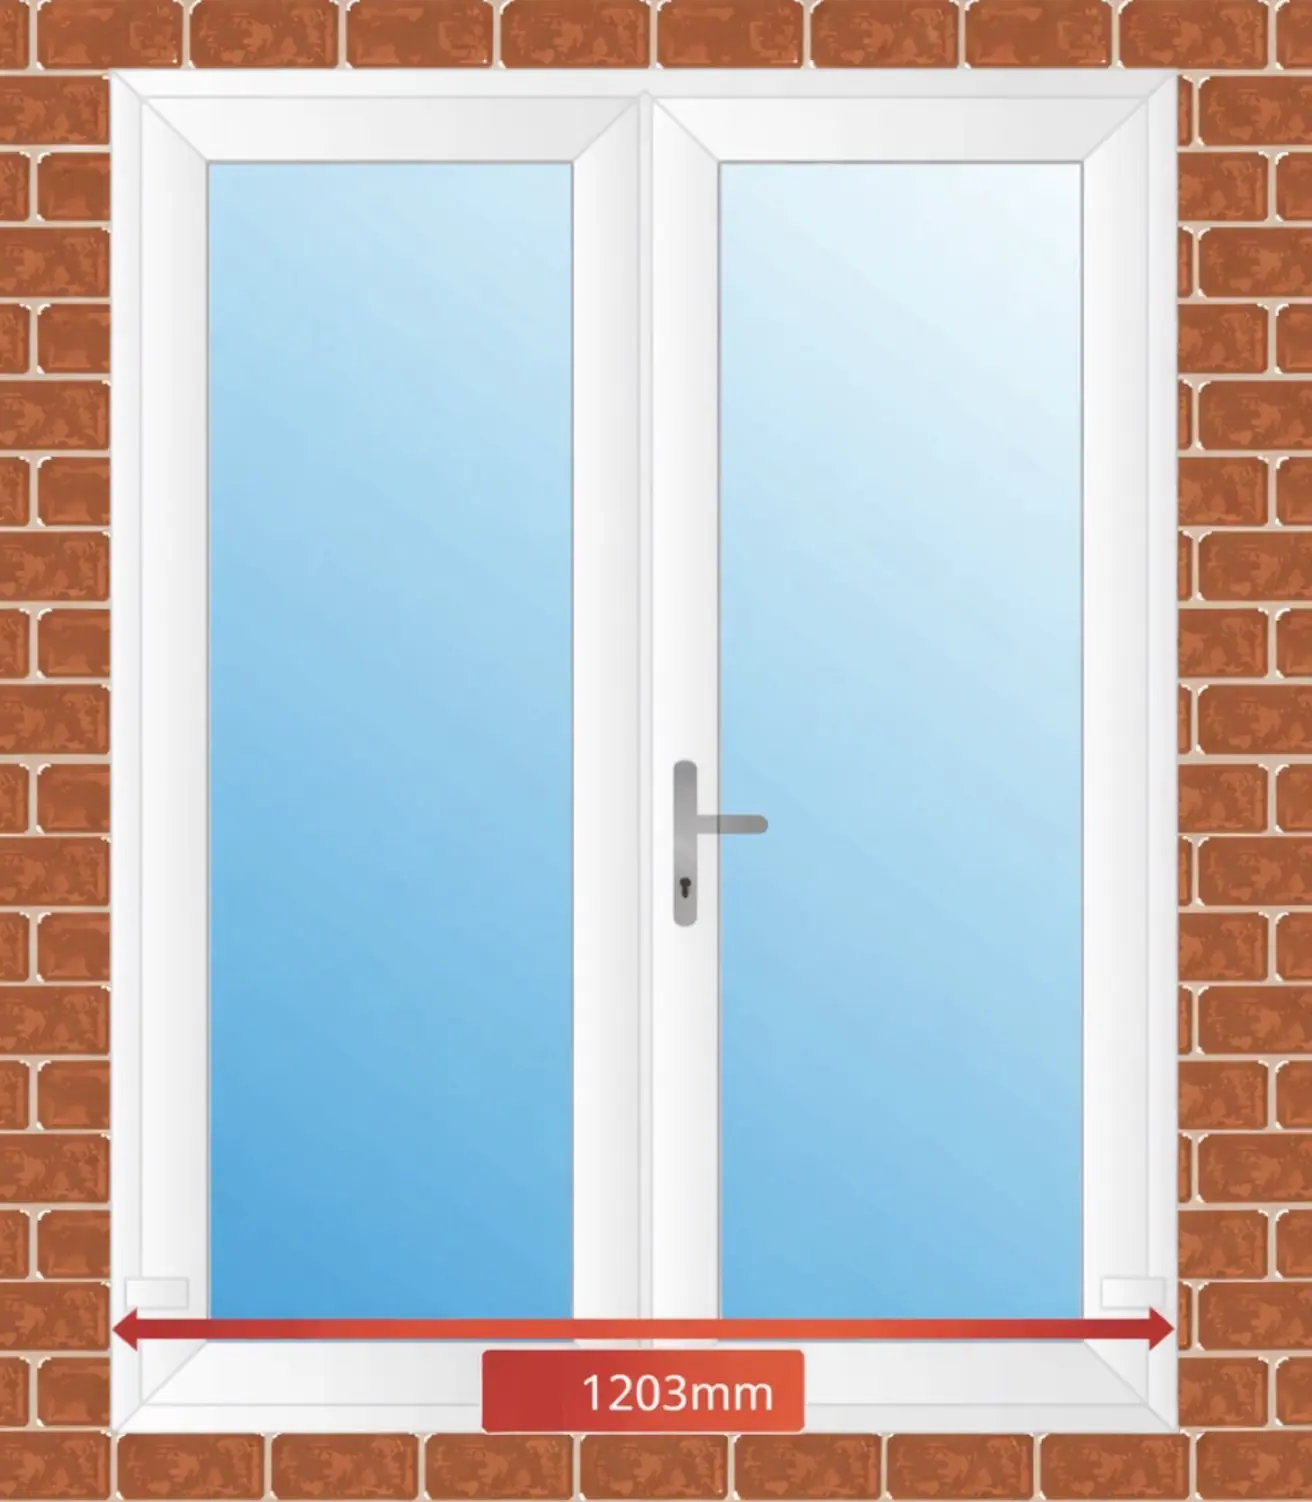
Step 2: Check opening width and glass span
Glass thickness and maximum span depend on the SKYFORCE model. ONLEVEL UK’s sizing guidance shows different maximum spans for SKYFORCE TOP and SKYFORCE SIDE depending on glass thickness. The product shown in your screenshot is listed as a SKYFORCE Juliet balcony with a maximum glass span of 1200mm.
- Measure the full opening width accurately.
- Confirm the required finished guarding width.
- Check the proposed glass width against the allowed span for the selected system and glass thickness.
Step 3: Confirm substrate and fixing suitability
Before drilling, confirm the fixing substrate is suitable for the chosen SKYFORCE model. Retail and distributor pages describe SKYFORCE as suitable for installation to masonry, concrete, steel and some window-frame applications depending on the fixing type.
- Inspect the reveal, frame or façade fixing area.
- Check that the substrate is structurally sound.
- Use the correct fixings for the base material and project-specific engineering requirements.
Step 4: Mark out the bracket or profile positions
Once the fixing type is confirmed, mark the exact installation positions on both sides of the opening. Keep the fixing points level and symmetrical so the final glass panel sits correctly.
- Mark the left and right fixing points carefully.
- Check all measurements before drilling.
- Use a level to ensure both sides align correctly.
Step 5: Fix the SKYFORCE profiles or brackets
Install the supplied side pieces, brackets or profiles in line with the official SKYFORCE kit instructions. ONLEVEL highlights quick installation and slide-clip technology, but the exact fixing sequence should always follow the supplied product documentation for the version you are using.
- Drill all fixing points accurately.
- Fit the supplied fixing elements in the correct order.
- Check alignment before fully tightening.
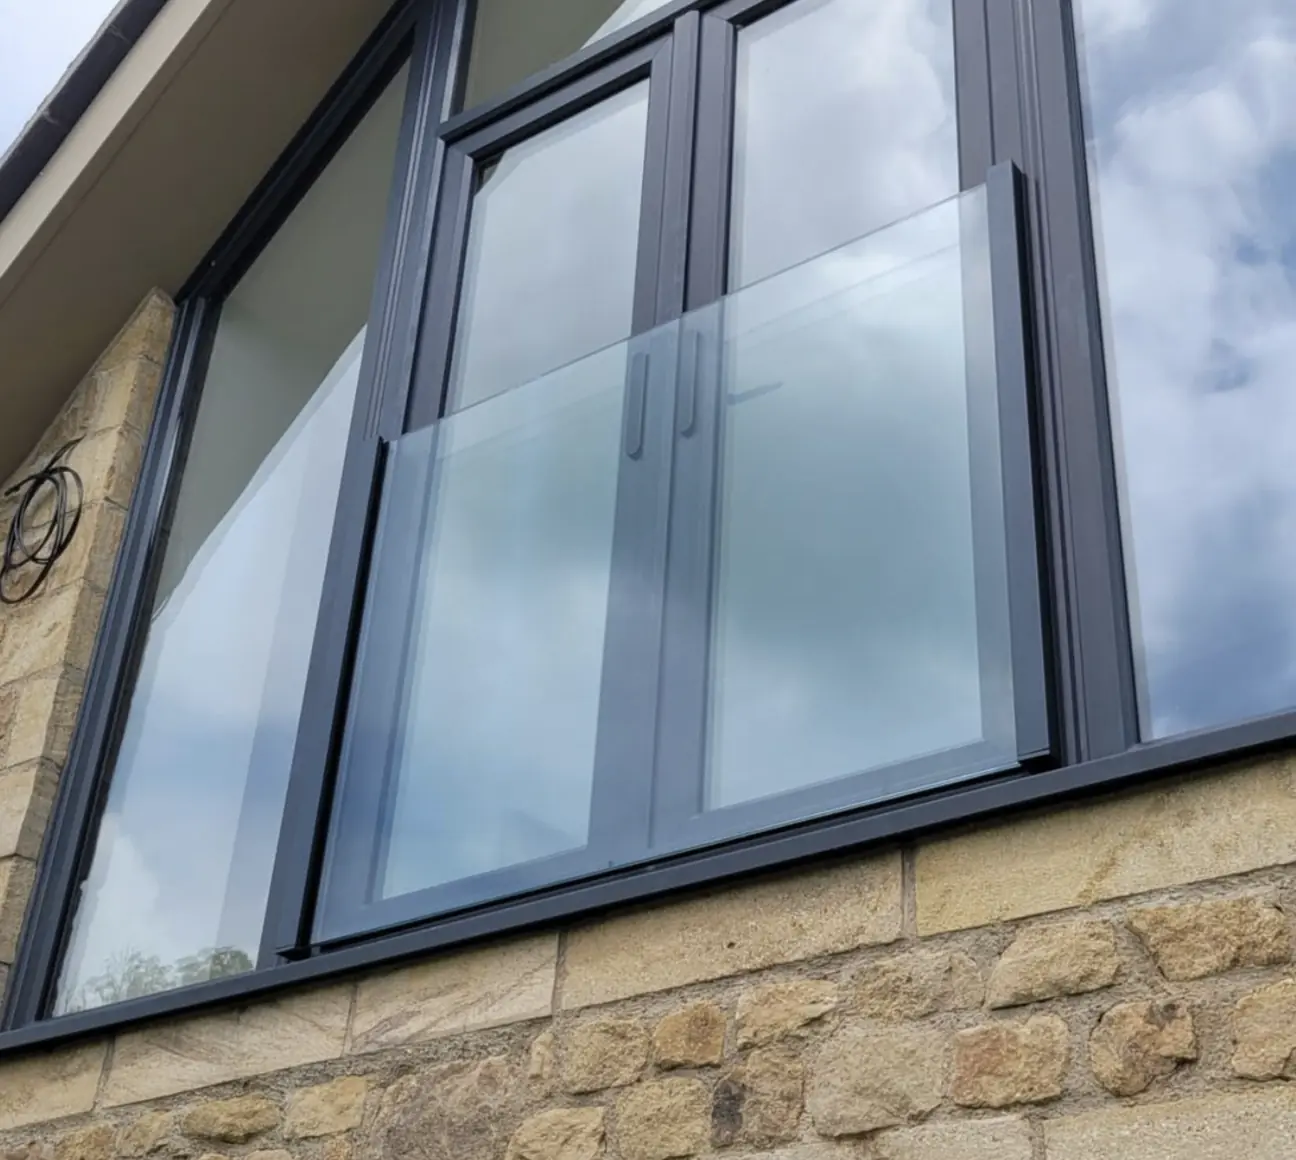
Step 6: Install the glass panel
Once the supports are fixed securely, position the laminated glass panel into the system in accordance with the supplied ONLEVEL instructions. Confirm the panel sits evenly and that all retention components are installed correctly before final tightening.
- Handle the glass with appropriate lifting protection.
- Seat the panel correctly within the installed system.
- Confirm edge cover, alignment and visual finish.
Step 7: Complete final safety checks
Before handover, check the finished Juliet balcony for alignment, fixing integrity and visual finish. The Made2Measure listing for the shown SKYFORCE product states a 1.5 kN rating and recommends checking fixing and test data via the supplier documentation.
- Recheck all fixings and covers.
- Confirm the glass is centred and secure.
- Check the finished installation against the ordered dimensions and supplied documentation.
Important note
This page is a practical installation overview for SEO and customer guidance. Always follow the exact ONLEVEL SKYFORCE installation instructions supplied with the kit, and confirm glass thickness, span, fixings and substrate suitability before installation.